Soil testing for pastures
Soil nutrient availability is a critical factor that influences pasture productivity. Soil testing is a useful tool for understanding how to improve the growth, quality and sustainability of pastures. This page summarises the key points to consider when planning a soil test and collecting samples for analysis.
Soil tests should be analysed by a NATA (National Association of Testing Authorities) accredited laboratory. Most soil testing laboratories provide sampling guidelines which should be consulted before taking and submitting samples. An advisor accredited with FertCare® can assist with interpreting the results and making fertiliser recommendations.
Why do a soil test
Soil testing can be used to:
- assess nutrient availability and determine if fertiliser is required
- diagnose pasture productivity issues and determine if remediation is needed
- monitor the ongoing status and effectiveness of any development or remedial activities over time.
Together with land type mapping, soil testing also provides valuable information to determine a paddock’s suitability for pasture development. It can also help inform how activities like cultivation, fertilising and planting should be done.
What to test for
If soil testing has not been conducted in the past, it is recommended to undertake a comprehensive analysis. This involves measuring several parameters in soil that is collect at multiple depths down the soil profile.
A comprehensive laboratory soil analysis will cost approximately $150 per sample and will include the following:
- soil colour and texture
- macro and micro-nutrients
- pH, salt, cation exchange capacity
- organic carbon and soil organic matter.
When to collect soil samples
Soil testing should be conducted with enough time to allow for lab analysis (2-3 weeks) and planning the desired activity, such as purchasing and applying fertiliser or seed for a new pasture.
If the aim is to establish a new pasture, soil samples should be collected once the original pasture has been cultivated (or sprayed). If the aim is to determine whether an existing pasture should be fertilised, soil samples can be collected any time, but be mindful of the best time to apply fertiliser in your region.
When timing sample collection, consider the appropriate time based on the pasture growth cycle, paddock accessibility and ease of sampling. It’s best to avoid sampling under very wet or dry conditions, as these can make obtaining samples difficult and compromise results.
Where to take soil samples
Soil should be sampled from sites that are representative of the area in question as only a small portion of the submitted samples are analysed. Ensuring samples are representative increases the likelihood that any remedial action taken will have the most effective outcome.
Soil samples should be taken from each soil type and analysed separately. Indicators of changes in soil type include colour and texture, vegetation and the productivity of the current pasture.
Sample at least 20 m away from areas such as fence lines, livestock camps, high voltage powerlines, gas lines, undergrown cables, dumps, livestock dips, etc. Samples can be taken in patterns across a paddock such as straight transects, grids, zigzags or tight clusters.
Record GPS points where soil cores are taken and make a note of which samples were combined together to produce the sub sample for one soil type.
Who can collect samples
Soil samples can be collected by anyone, including producers. However, it is important to follow specific sampling protocols and handle the samples correctly.
Unless producers have the right equipment, it’s generally easier to use a local agronomist with specialist soil coring equipment to take samples throughout the whole profile down to about 1 m. An agronomist can also package and submit samples to the laboratory and provide interpretation if required. If using an agronomist, it’s still important for producers to be part of the process so they know where the samples were taken and the sampling protocols used.
Producers can easily take their own samples as this can be a cost-effective way to sample large areas or multiple paddocks. Depending on the equipment available and the soil type, most samples collected by producers are taken from 0 – 10cm depth (the topsoil).
Collecting topsoil samples
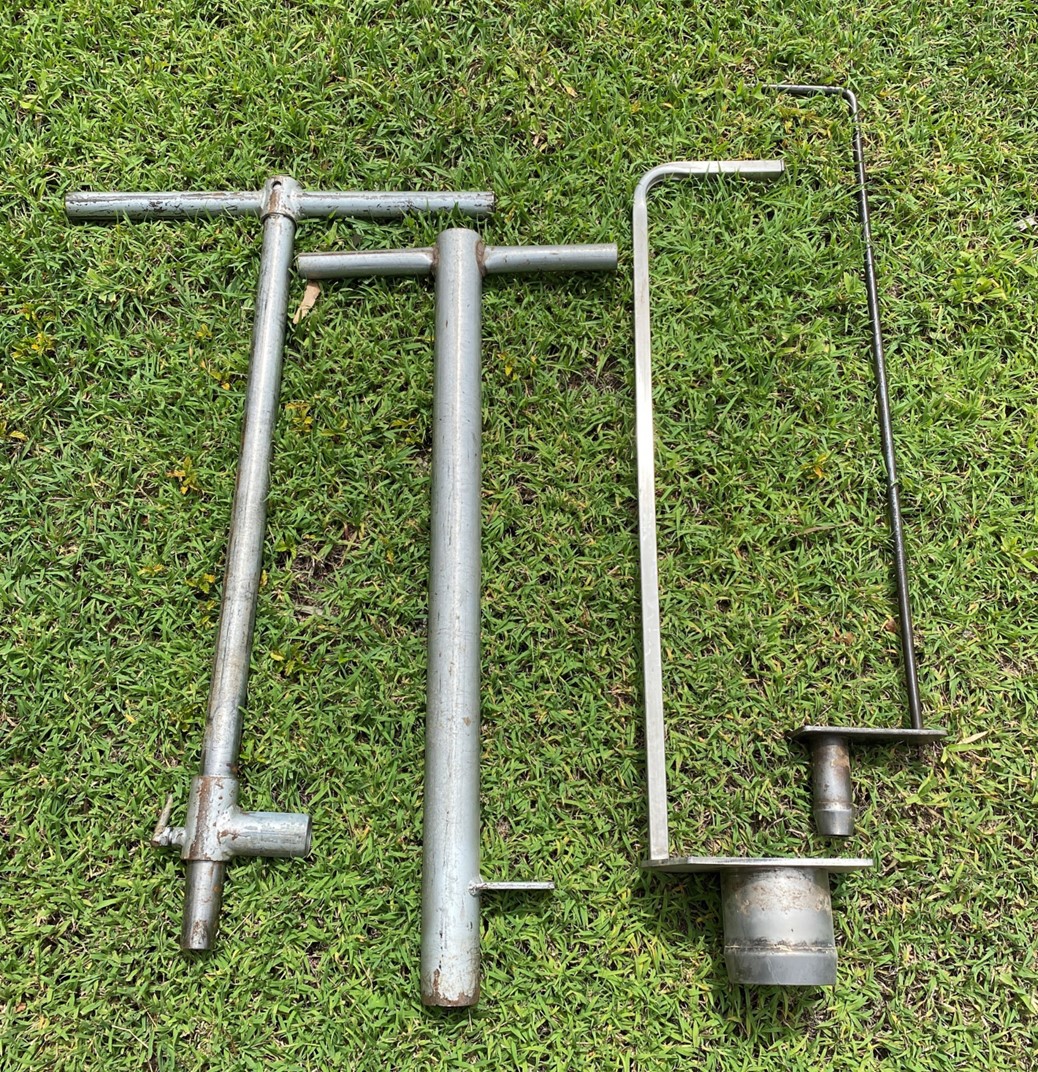
In each soil type, take 15 – 30 samples and pool them together. Samples should be taken at a 0 – 10 cm depth and collected using tools like a shovel and pick, or a hand-auger or foot-stomp corer. Foot-stomp corers can easily be made using off-cuts of steel rod and pipe, providing an easy and consistent way to sample at exactly the same depth.
It’s important to avoid contamination between soil types. Always start with clean tools and buckets and be careful not to accidentally contaminate samples.
Once collected, combine samples from the same soil type in a bucket and mix them thoroughly. Remove any larger stones and vegetive matter. Take a sub sample (aim for about 500 g) and place into a sample bag for analysis.
Advantages of topsoil sampling:
- cost-effective to sample large areas
- measure important nutrients in topsoil
- no specialist equipment required
Equipment needed:
- shovel and pick or foot stomp corer/hand-auger
- brush to clean buckets and equipment between soil types
- buckets to combine samples
- bags to place samples in for analysis.
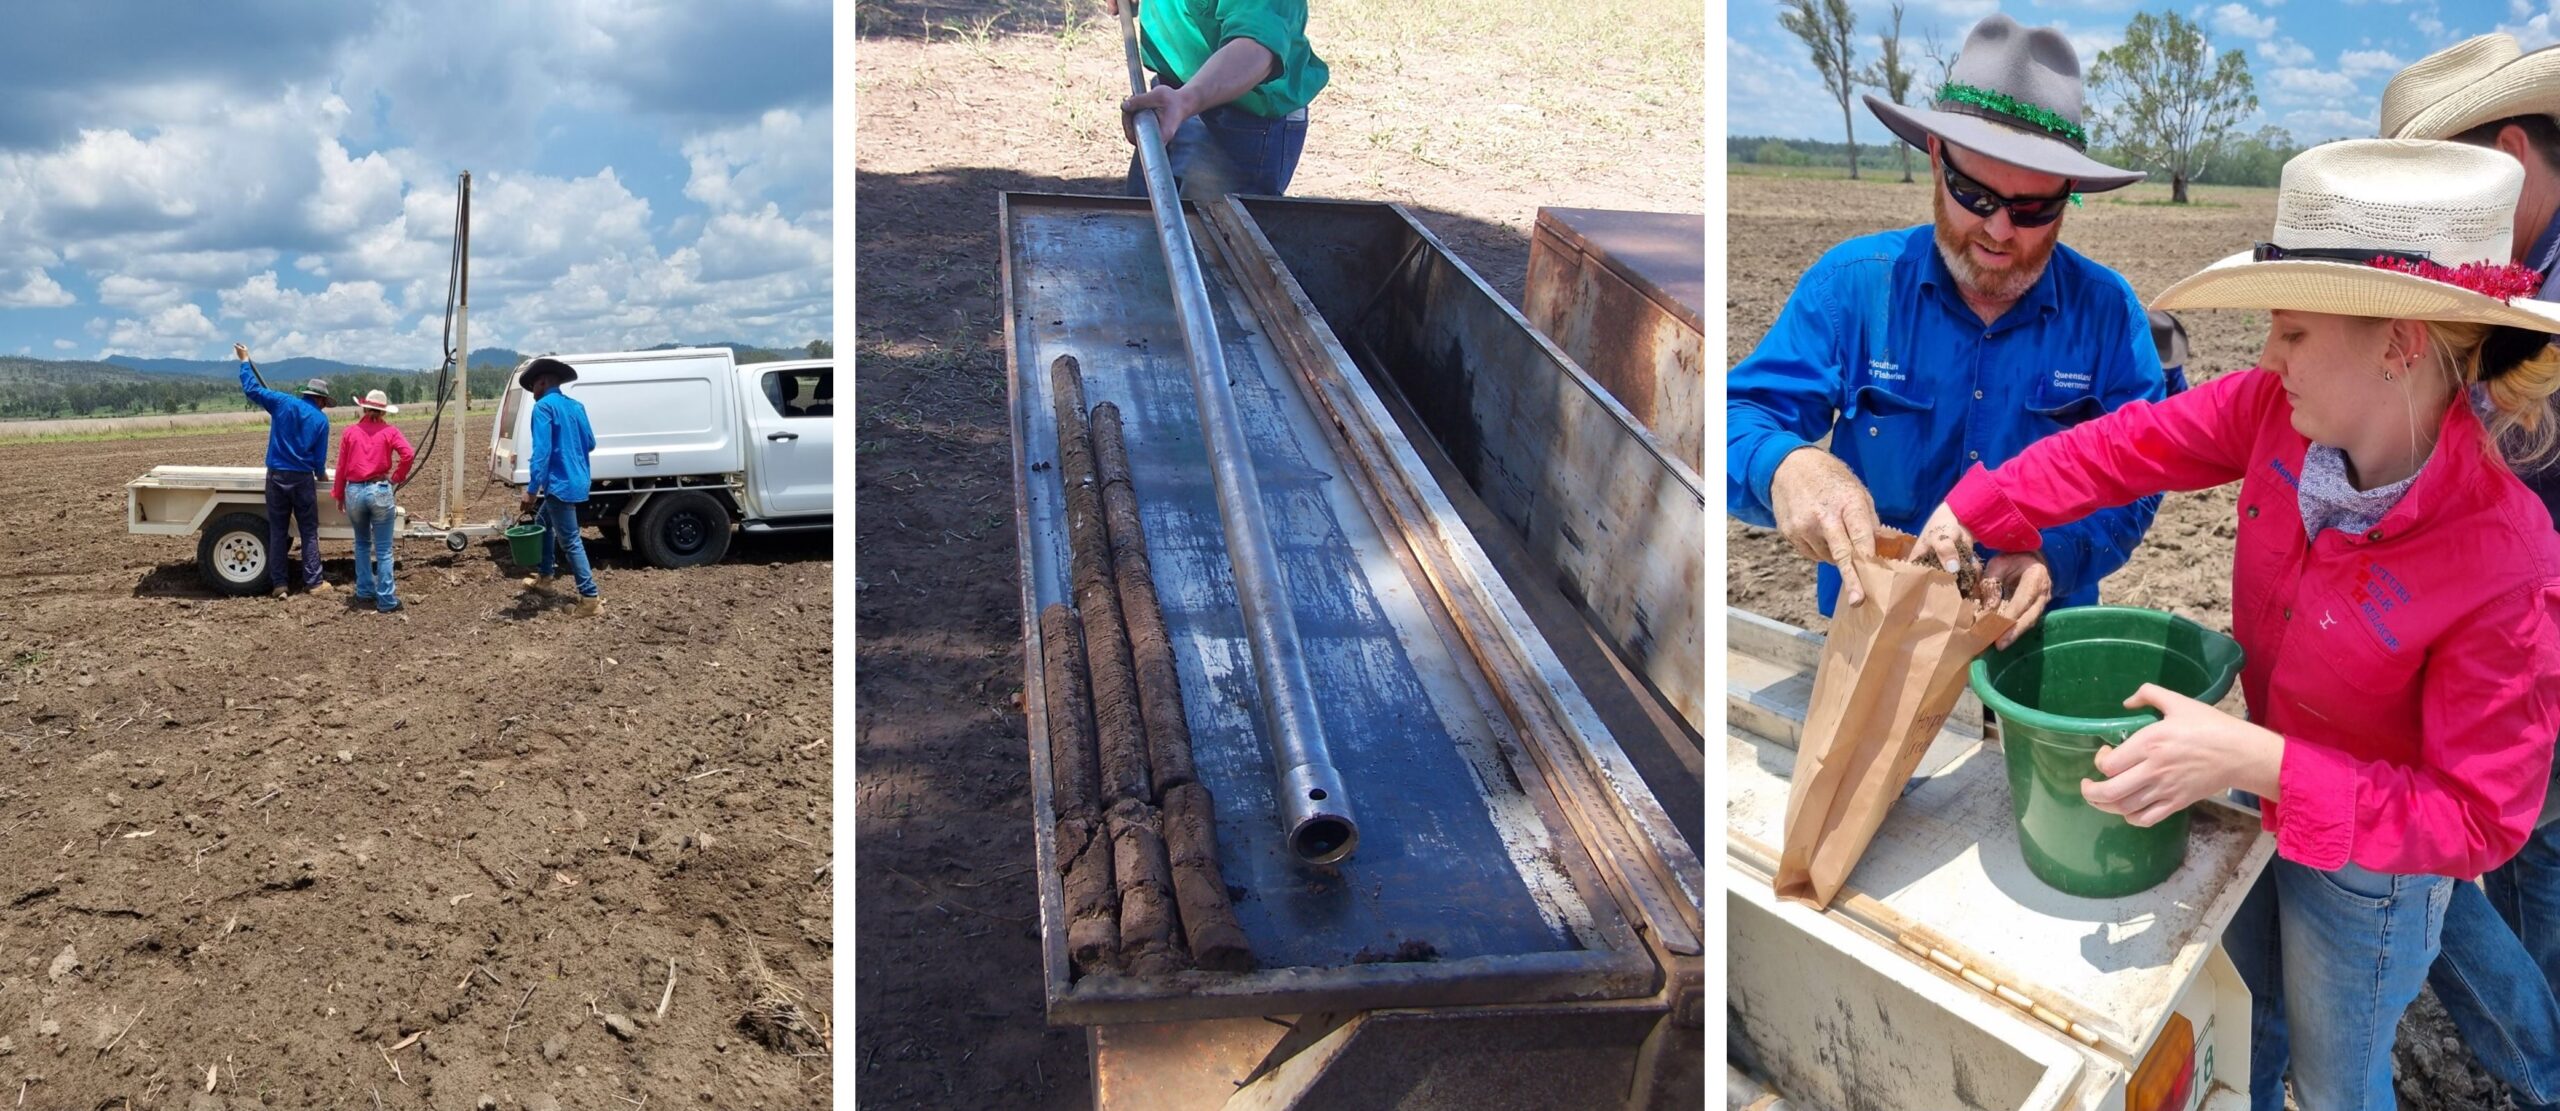
Collecting whole profile samples (down to 1 m with coring equipment)
For each soil type, take 15 – 30 cores to pool together. Each core should be broken up into 3 depths:
- 0 to10 cm (top)
- 10 cm to the depth of soil colour and/or texture change, or at about 50 cm
- remainder of the core depth, preferably to about 1 m.
When a soil core is pushed out of the casing, colour and/or texture changes down the soil profile can be visible. Pick an average spot where this changes and use this as the cut off for the second and third depths. If there is no obvious colour or texture change down the soil profile, use 50 cm as the cut off between depths 2 and 3.
In a bucket, combine all core segments for each depth of each soil type so one representative sub sample can be taken for every depth. Thoroughly mix together, removing any larger stones and vegetive matter. Take a sub sample (aim for about 500 g) and place into a bag for analysis.
Advantages of whole profile soil sampling:
- better understanding of soil at depth
- identify constraints for deep rooted plants
- locate deep nutrients that are immobile
- deep soil coring equipment required
Equipment needed:
- coring machine with 1.2 – 1.5m length steel sampling tubes
- lubricant for tubes
- tray to push soil cores out into
- measuring tape and soil slicer
- multiple buckets to combine samples from each depth
- bags to place samples in for analysis.
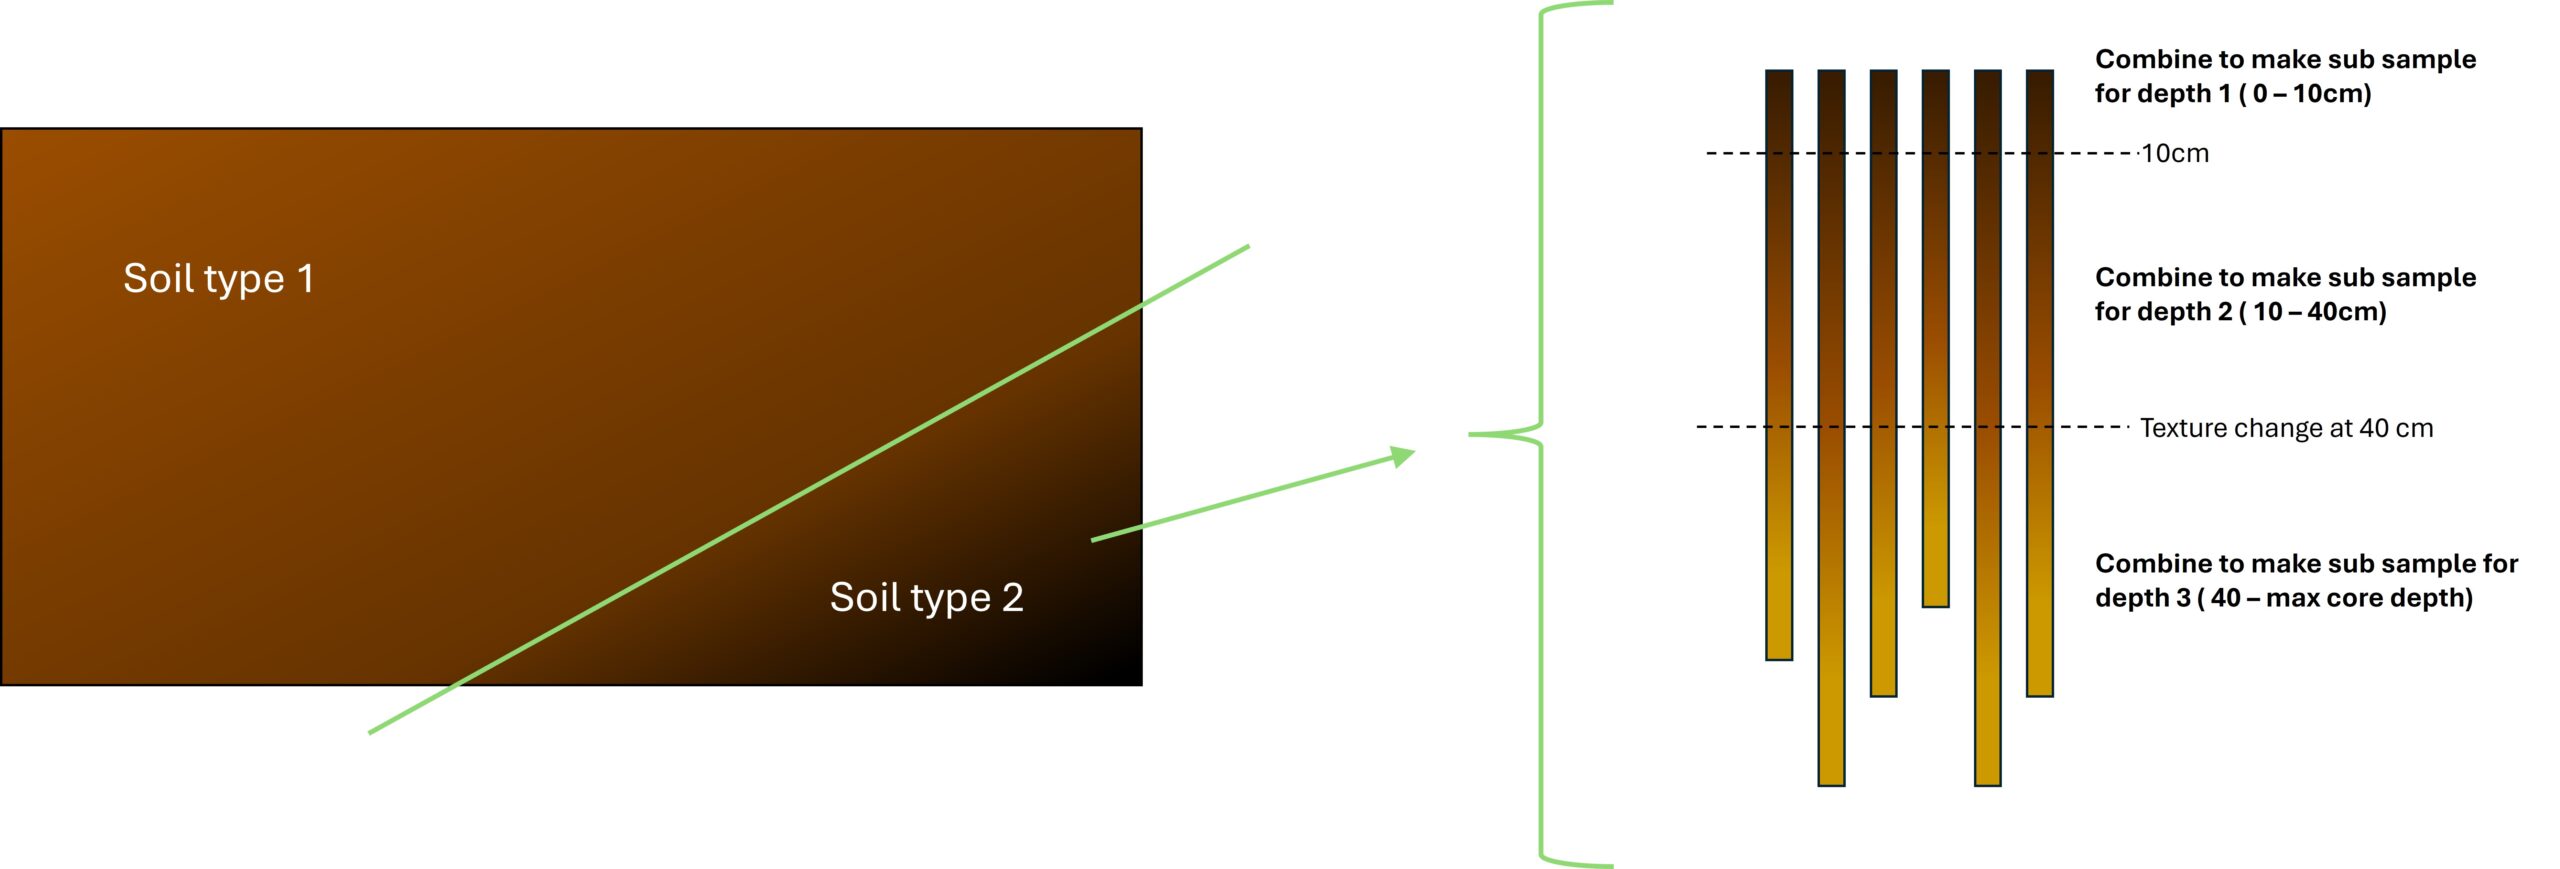
In this example, the paddock has two soil types. Soil cores taken in soil type 2 have a visual texture and colour change at approximately 40cm. Core segments from each depth are combined and a 500g sub sample is made from each depth. As there are two soil types in this paddock, there will be 6 samples for analysis.
Handling and submitting soil samples
Soil testing laboratories have guidelines on how to store and send soil samples for analysis.
Soil can be stored in a fridge (approx. 4ᵒC) for a few days if samples are not immediately sent for analysis. If there is access to commercial drying ovens, these can be used to dry the soil at 40ᵒC before submission. Or samples can be air-dried in a cool, dry environment.
Ensure all laboratory submission forms are fully completed and sent with the samples. These forms typically require information about the sampled site, which may include:
- landform
- vegetation
- history of land use, and fertiliser or soil ameliorant use
- intended use or development.
Soil test results
Most soil testing laboratories, or agronomists submitting the samples, offer fertiliser or soil amendment recommendations as part of the service. Sometimes an extra fee will be charged for this.
These recommendations rely on sufficient background information about the paddock, which is why completing the submission forms with as much detail as possible is important.
If an agronomist hasn’t been engaged in the soil testing process, producers can contact DPI for assistance in interpreting soil test results.
Further information
FertCare has written a great guide on soil sampling. Read it here.
For more information, contact the Queensland Pasture Resilience Program team or call your local extension officer on 13 25 23.
The Queensland Pasture Resilience Program is a partnership between the Department of Agriculture and Fisheries, Meat & Livestock Australia and the Australian Government through the MLA Donor Company. The five-year program aims to help Queensland producers tackle the three big threats to beef production: land condition decline, pasture rundown and pasture dieback.